
Parallel Parking Guide
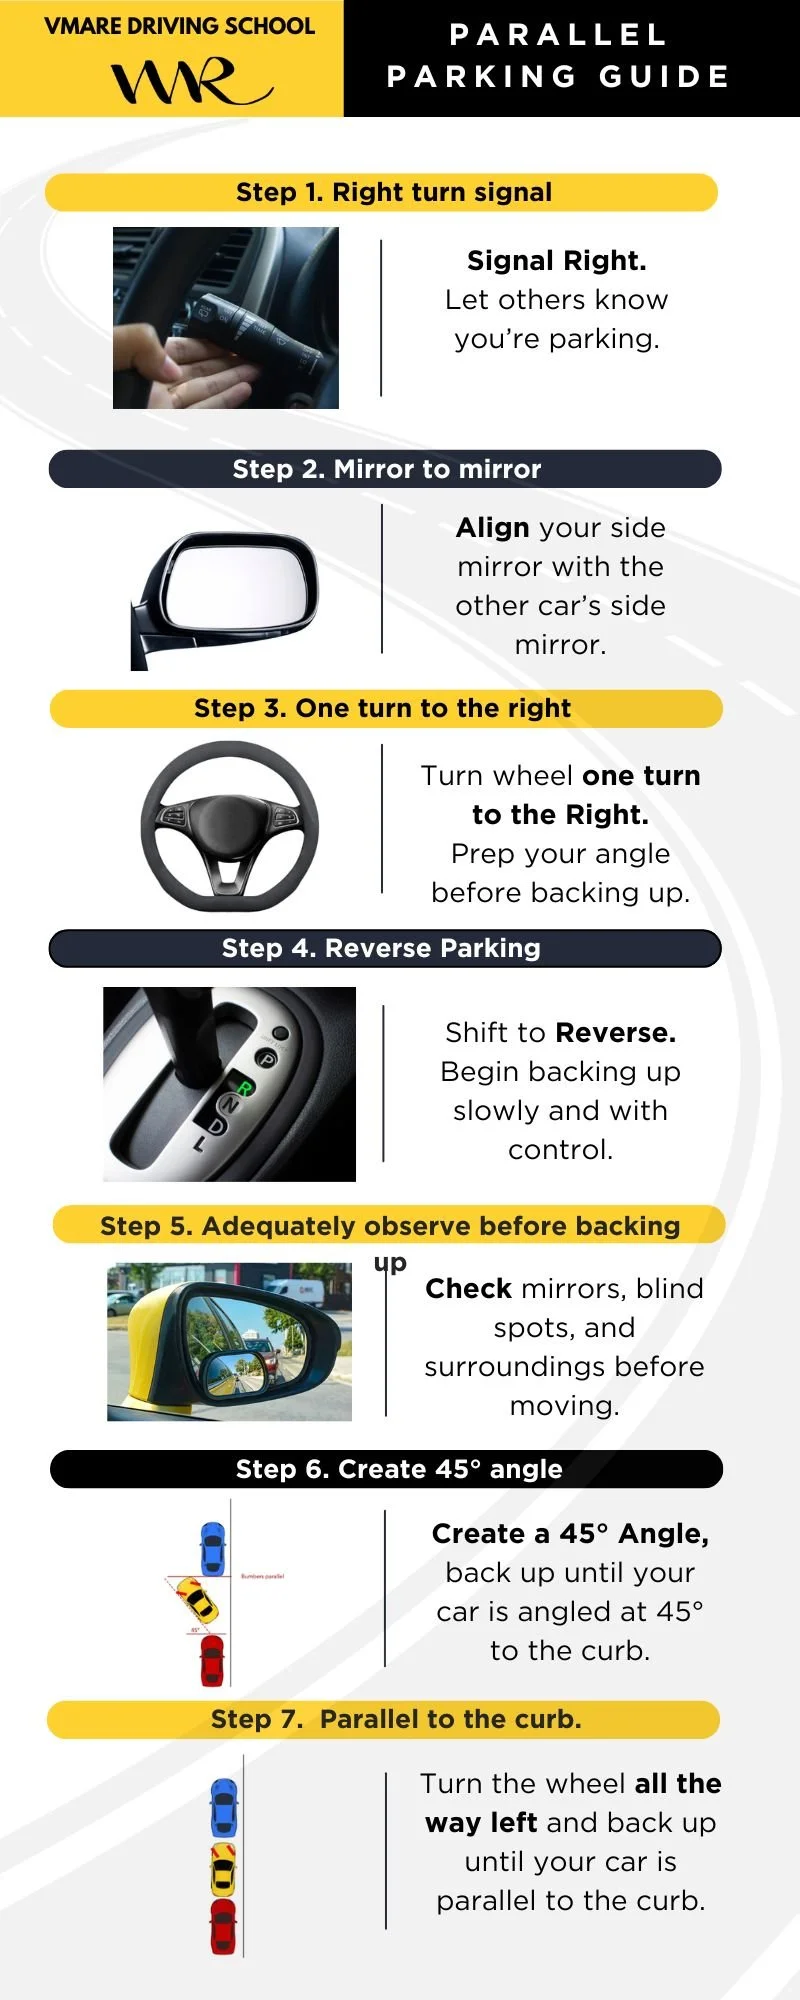
VMARE Parallel Parking Cheat Sheet: 7 Steps to Success
Mastering parallel parking is the final boss of the NYC road test. Follow this simplified 7-step guide from our professional instructors to nail it every time.
Phase 1: The Setup
Step 1. Signal Right: Early communication is key! Let everyone behind you know you’ve found a spot and are preparing to park.
Step 2. Mirror to Mirror: Pull up alongside the car in front of the spot. Align your passenger-side mirror with their driver-side mirror. Keep about 2 feet of space between the cars.
Phase 2: The Angle
Step 3. One Turn Right: While stopped, turn your steering wheel one full rotation to the right. This preps your entry angle.
Step 4. Reverse: Shift your gear to 'R'. Begin to creep backward slowly. Control is more important than speed here!
Step 5. Total Observation: Before you move, do a 360-degree check. Look over your shoulders, check all mirrors, and watch for pedestrians or cyclists. Never rely solely on a camera!
Phase 3: The Finish
Step 6. Create the 45° Angle: Back up until your car is at a 45-degree angle to the curb. A good trick: look for the rear bumper of the car in front to clear your front window.
Step 7. Parallel to the Curb: Turn the wheel all the way to the left (full lock). Continue backing up slowly until your car is straight and parallel to the curb.
NYC Road Test Gold Rules:
The 3-Foot Rule: You must finish within 12 inches (1 foot) of the curb to pass, but you have up to 3 feet of total space to adjust.
Don't Hit the Curb: A light "tap" is okay, but "mounting" or jumping the curb is an automatic fail.
Check Your Front: As you swing in, make sure your front bumper doesn't clip the car in front!
VMARE Pro-Tip: If you end up too far from the curb, don't panic! Ask the examiner if you can adjust. One smooth pull-forward and back-in shows better control than leaving the car in the middle of the street.